Tuesday, March 22, 2016
Selling off items from my makeup kit!
Check out the page here: instagram.com/makeupkitclearout
Just comment with your email to claim an item.
There are plenty of items from my stage makeup kit if you need to stock up to do yours for an upcoming show.
I have range of colors suitable for fair to dark complexion as well.
Buy a full face (foundation, blush, 2 eyeshadows and a lip product) and I'll throw in a pair of my favorite KoKo lashes for free :)
email me for any questions
Sunday, January 17, 2016
This is (probably) why you "suck" at your own makeup
Now, first thing, I don't think you suck at your own makeup. I just phrase it this way because of how many friends and clients come to me and use such terminology. But let me be clear, whereas some may think I've got some natural gift for this makeup thing, don't be fooled. It's been a loooonggg road.

Orange brows, blotchy foundation, no concept of concealer or blending. The me from my 20s had a lot to learn!
What I've come to understand is that makeup is like anything else in which someone can excel. Especially if one has a natural talent for it or something like it. If someone is naturally artistically minded and decides to invest time and energy into makeup, it will be easy for them to develop strong skill. All the women on my mother's side of the family are artists of one medium or another. My grandmother was an amazing oil painter, she had incredible eye for detail. And my mom could whip up a fantastic graphic design or sketch in seconds. I'm no exception to the lineage. I grew up drawing and loving art and music. And my time in theatre in high school gave me plenty of practice in stage makeup. But for the majority of my twenties, I couldn't have cared less about cosmetics. I was having a fancy day if I bothered with lipstick and eyeliner!
I didn't start even paying much attention to more than that until I was in my late twenties and started watching YouTube tutorials one day. I started playing with brushes (I think I only ever used my fingers until that point o.O), eye shadows and so on. When I did my first bikini competition I did my own makeup because I didn't want to pay someone else. I kept doing research on stage makeup and learning tips from people on YouTube and did a decent-enough job at my own face. It got better for the second show. By the end of that year, I had a request from one of my teammates to do her stage makeup. My business as an MUA grew from those experiences. But I never just "threw something together." I'm perfectionistic and spent many, many hours practicing makeup on myself and friends before I took a dime for any service.

Stage makeup for second show. Still hadn't figured out that blotchy foundation issue (among other things).
Over the years, my skill with makeup became my main interest because a turn in my health forced me to stop exercising a live a more sedentary life. Doing stage makeup kept me in an environment I truly enjoyed and around a lot of positive and inspiring people until I was able to have energy enough to exercise again. When you've got two years to kill being a tired little couch spud, all those hours I had been spending in the gym transitioned into education and practice in makeup.
So, because I had a lot of free time and an artistic bent to my personality, makeup became something that I could be more inclined to thrive in once my energy was devoted to it.


And the only thing stopping you from being better at makeup, is probably the fact that you're more passionate about other things! And that's awesome! But even if you don't have creativity in your bones or a passion for makeup, you can still be really good at it.
Here are my tips for improving your makeup game:
- Pick one thing you want to improve upon (like lip lining or winged eyeliner) and learn about it. Start with pro makeup artists, typically they can be better at giving step-by-step instructions than your average youtube tutorial. There are plenty of books and videos available to suit the way you best learn.
- Practice for 10 minutes at night before you wash your face. If it sucks, it's no big deal, you can wash it off and there's no pressure to get out the door!
- More often than not, the problem is not the product, it's the technique you're using. Many people are constantly chasing down the "perfect foundation" or the "perfect eyeliner" or whatever. Don't get trapped by consumerism. The makeup companies that real pros (not instagram imitations) use, such as Ben Nye, RCMA, and so on, aren't flashy or made for the average consumer. But usually are less expensive AND work just as well or even better than what you can buy at Sephora for 4x the amount.
- Practice with drugstore makeup and art brushes from craft stores. While you're learning, save some major coin! Art store brushes (you can find amazing eye, lip and face brushes at Michael's) are typically only a few dollars, and many mainstream makeup brushes are modeled after them anyway.
- Take pictures and video of yourself as opposed to always relying on the mirror. The lighting and change of angles will show you quickly the kind of progress you're making each week and areas you still need to work on or things you might miss when you get used to your own reflection.
Let me know if this helps!
Sunday, December 6, 2015
Beauty gift guide 2015
I stress about getting just the right gift
as much as anyone. So if you’ve got a beauty-lover on your list…. Here are my
favorites, simple to mix and match to create the perfect package of
gorgeousness.
Perfume

Womanity
My fragrance preferences are clean, woody, and foodie (sweet and/or spicy). And if this perfume hadn’t already been made, this is what I would create. I just love it and it will always be on my list. I guarantee compliments anytime I wear it.
Buy: http://www.muglerusa.com
 Haus of Gloi
www.hausofgloi.com
This site gives you or your giftee an
amazing range of scents to create your perfect mix for soaps, lotions, oils,
and more. Amazing and creative gift for
those creative and adventurous types.
Body Care

C. Boot Ginger Sugar Body Scrub
Hands-down favorite scrub ever. I was never impressed by what I found in stores, so I’d always created my own. But when I tried this one, I was hooked on the yummy fragrance of sweet ginger. It’s beautifully effective at making your skin feel silky and new without turning your shower into an oily safety hazard!

Almond Oil
If you’re looking for a lightweight, natural moisturizer, this is my pick. Sinks in easily to the skin without a greasy feel. And it’s easily accessible at most health stores.Beauty Tools

Crown Brush Syntho Series
Especially when this comes around on Haute Look for super cheap… These are my must-own brushes. Incredibly soft and durable. I’ve never had them shed, go ruff, or fail me in any way.
Sephora Smoky Liner #24
Perfect smudgy bottom lash line. Done!

Real Techniques Miracle Complexion Sponge
Granted, I’ve never used a Beauty Blender.
But when you have a sponge that works as well as this one, plus it features a
unique flat side aaaaannnd it’s ¼ the price… Fughetaboudit. I blend my
foundation, concealer, contour, cream blush to perfection then use the flat
side to set with my loose powder.

Hot Tools Marcel Wand
I have this in two sizes. But the most requested "big loose curls", I use the 1 1/4" wand for that look. You have to note, there is a definite learning curve with these wands. The barrel and clamp move in ways you're probably not used to. I highly recommend using a heat glove at least the first few times you use this. I still have scars.......
However, once you get the hang of using it, you won't go back to another wand. Perfect curls with massive lasting power!
Makeup

Sephora Waterproof Contour Eye Pencil
The colors in this range are amazing. My favorite is called "Fairytale" (shown on left), teal green with multicolored reflects. They're dirt cheap and rival any higher end offering.

Girlactik Matte Lip Paints
One of my favorite beauty brands. These are the clear winners for best liquid lipsticks that I've used. They are very lightweight and don't dry down and leave your lips flaky in a few hours. Dream lip products.

Kat Von D makeup
I doubt there is a dud in her line. I'm frequently asked what my favorite brand is and she has it. My favorites are the powders (eyeshadows, contour palettes, blushes). She doesn't mess around with poor quality, and her whole line is cruelty free. If I were a collector of anything, it might just be her palettes. I could get back ups of back ups and be pleased as punch.
My list

Face Paint by Lisa Eldridge
Lisa is one of my favorite makeup artists. Best known for her celeb clients like Kate Winslet and Kira Knightly. This is a perfect gift for the person who's into makeup and probably already has everything. That's why it's on my list ;)
It's not an instructional work, like most beauty books. Lisa provides here an interesting outlay of the history of makeup and the way it's been used from centuries past to the last few decades.
I hope this short guide gave you some great ideas on how to bundle the perfect gift for your friend or family member who is either just starting or already neck-deep in the world of cosmetics and beauty.
Happy holidays.
:)
* All images sourced from Google*
Thursday, September 24, 2015
Dat Fleekness!

[Oh heyyyy, that's my face! All shadows are Kat Von D Innerstellar palette. Brows are Anastasia Beverly Hills pencil and pomade. Lashes are.... huge! I don't remember what I used]
I asked on my Facebook what I should blog about today, and one reply was "eyebrows on fleek!" LOL. So I'm actually going to take that idea and run a bit in a different direction with it.
If you're on instagram for any length of time, you'll come across memes about bad eyebrows. It's actually become quite the compliment now to mention how good a girl's eyebrows are. And as someone who has to DRAW the majority of my brows on, I can't say that I don't also enjoy someone saying something positive.
But instead, I won't be outlining an eyebrow tutorial, because you can find that anywhere. What I'm going to write about is preferences and styles of makeup. I've learned so much of what to (and not to do) via social media, youtube, and makeup classes. But what you'll have to take with you after all of it, is that makeup is an art. And art is subjective. As much as I love a good dramatic eye or lip, my true passion is flawless skin.... without a filter. And that's where the craft is for me. Especially when I'm short on time, I'm going to focus on skin instead of eye makeup. Why? Because I want my client to take tons of selfies and not open FaceTune once to fix a harsh line!

[My client Amber and her husband, Brandon. I wanted to give Amber the perfect smoky eye for this special night in Vegas last week, but I couldn't do what I wanted. Because my cab never showed up, I ended up being more than 15 minutes late. I had to do the best I could with a little over half an hour application time. But as you can see, she glowed and looked beautiful.]
I just find it funny how if you pay attention to what is trending on Instagram and other social media outlets, it's the "more dramatic the better" approach. And perfectionism leads the race. Filters on filters. Even video gets filtered and edited into a brand new creation.

[Case closed: These three pictures were taken at the same tutorial class online. The picture on the left and the upper right were taken at the same time. This class featured a front camera and a zoomed side which they ran simultaneously during the live feed. I kept waiting for the artist to grab his blending brush.. but he never did! I took screen shots of the feed because I couldn't believe what was happening! What's funny, is that when the uploaded the final cut to the site, they removed the zoomed angle shot. And what you found all over instagram was the bottom right, highly photo shopped image.]

[Here's the other problem I have with all the filtering you see on social media, it can make you feel bad that even though you're doing your best, it just never measures up! At least that's how I felt in the beginning. In the above picture of Vivian, I went all-out on the filters on the right side, but left side is untouched. To me, I don't know what these makeup artists are trying to sell with making all these changes....]
So where I go for inspiration to improve my skills are actually the HD pictures taken at red carpet events. Those cameras don't hide ANYTHING. I love following makeup artists who take the same eye for makeup. No harsh edges. No filtering. But naturally enhanced beauty.
To me, when someone sees how beautiful one of my clients look, I don't want them to notice their makeup first, but the confidence and natural beauty shining through. But that's just my aesthetic. And if you love heavy contour and stick-straight cat eyes, you rock that shit out!
Fleek out your brow with all the pencils, pomades and concealer you want! Some people do a jaw-dropping job at it.
My aesthetic is as natural as I can get away with, at least most of the time!
Fleek out your brow with all the pencils, pomades and concealer you want! Some people do a jaw-dropping job at it.
My aesthetic is as natural as I can get away with, at least most of the time!
Friday, September 4, 2015
How I made a custom powder contour kit for my pale-skinned roomie.

[Jessica was more tan on this evening when I did her makeup. I was having a Katie Holms smoky eye moment that night]
How many contour kits are out there now? More than you can shake a blending brush at, for sure. And while I personally love the Kat Von D kit as well as the brush that goes with it, it's not built for everyone. And many that are offered on the commercial market don't seem to completely fit the fairest of skins, and even if they have one or two colors that fit, the rest of the kit is typically unusable.
When I asked my roommate, Jessica what she'd like to add to her makeup collection, she said she wanted some beginner powder contouring options. While I favor creams, not everyone feels confident enough to use them.
So here's my beginner-friendly contouring "kit" for super fair skin.

Starting with the Blush Brush from E.L.F
This is one of my favorite contouring brushes. Forget your name brands, aside from the Kat Von D brush, this is my favorite.

Taupe and Nude.
I chose two colors because they bother offer something different. Taupe casts more gray tone while nude is slightly rosy and warmer. When I contour, I rarely use just one color. If you look at your face and pay attention to the colors, you'll find that it has a gradient with the natural shadows. At the high points you have a lighter version of your own skin (the highlight section). As you transition into the darkness or shadows, you move to your natural skin tone, a darker version of it (usually a slightly warm or taupe) and then the grey or darkest color. This is why I bought two colors. When she wants to give more life to her face and enhance the definition, she will follow that same pattern. A small amount of deep color and more of that lighter transition.
What I also like about these particular powders is that they are fine and not very pigmented. Harder to mess up and therefore great for beginners. You can always add more, but it's very hard to take away.

The only slightly more expensive aspect of this collection. But well worth it. This is another soft powder built for naturally fairer skins. It won't pull orange and the fact that it contains no shimmer means that you'll have a natural look to your skin.
My steps for natural contouring:
1. If using liquid foundation, set with a light layer of loose powder (check out other posts for product recs)
2. Use Nude powder around perimeter of face. Sides of forehead, upper hair line if you want to lower it (optional), slightly on (not under) cheeks, jawline, and with a fluffy eyeshadow brush upper sides of nose (not flat sides as that can make your nose look wider)
3. Use Taupe on areas of face that you want to make a more dramatic change in. For Jessica, sides of forehead, backs of cheek (only slightly below, go too low and your face will sag) and a small, fine line on upper sides of nose.
4. Use bronzer to help blend and unify the look. Applying where sun would naturally tan the face and avoiding areas you want to highlight. And if the face and neck are lighter than the rest of the body, use bronzer on fair areas to create balance.
Monday, August 31, 2015
Overhyped and Underwhelmed..... My recent disappointments
The feels.... especially if you're one to watch a lot of YouTube or read many blogs. These beautiful makeup junkies get so excited about a certain product and you can't help but want to buy it for yourself. If only to look half as good as they do using it.
A little over two years ago, I was well-invested in the YouTube beauty community. Watching hundreds of tutorials, monthly product favorites and reviews and in turn, watching my makeup collection grow from a modest desk top organizer to literally consuming my bathroom closet. And for those who don't know anything about the aforementioned: on YouTube, many people create beauty channels to share beauty tips and makeup instruction... or that's how it was back when it began. Now, it's become a career for many people. Millions of subscribers and hoards of "gurus" making bank off of marketing for makeup and skincare companies. While many are forthright with admitting they have products sent to them for review, they usually don't share the fact that some companies will only pay the YouTuber if the video is a positive review. And thus... the naïve are sucked into opening their PayPal wallets. And that's not the only way we get suckered. But I'm not here to bash anyone for paying their bills.... dude, I have YouTube videos and they make me money as well.
Nor am I here to dis any makeup company, as for each product I have here to complain about, something else from that company is frequently used in my makeup kit. But the products listed below are personal fails because they didn't work for me, but might just be your favorite new find. So, "grain of salt".


Personal Fail: Champagne Pop highlighter
Here's the video in which Jaclyn introduces her new highlighter with Becca cosmetics.
Now, what gets me is her insistency that it will work for alllllll skin tones. Well, long story short, nope. Not for me nor any of my fair-skinned friends. If your highlighter is darker than your skin.... it's not a highlighter. And that's what I found to be true for us. Now, I will say, that when I use it on my medium to dark skinned clients, it's a total win. I've used it a lot on my competitors as well and loved it. The other issue I've had with this product is how powdery it comes off with a brush. I just can't use my fan brush with it if I want more than a sheer finish.
Alternatives:

NARS Albatross for intense glow
best for neutral to yellow undertoned fair to light-medium skin

MAC Soft & Gentile for medium to buildable glow
best for neutral to pink undertoned fair to light-medium skin

Girlactik Face Glow in Natural for subtle glow
best for neutral to pink undertoned fair to light-medium skins, especially those not wanting to enhance texture or fine lines
My Girlactik makeup haul video (no shame!)

Fail: Jaclyn Hill colab with Gerard Cosmetics
I'm not even going to call this one a personal fail because aside from the colors neither reading true in the above picture (these are lighter and with a softer pink hue than in person) or on my skin which pulls any warmth in a lip color to an orange hue, the formula itself is hard to wear. I find the lipstick to be very dry and often patchy, and the glosses to be incredibly thick and goopy. Also the pink shade of gloss, the packaging leaks to the point I've covered the gold seams with super glue, which only hinders the leaking. I fell like a rock for Jaclyn's hypnotizing excitement and beauty. I've kept Buttercup lipstick in my purse since purchasing but cannot wear it alone. I've given the Buttercream lip gloss an honest effort since gluing the packaging. I keep it with my daily makeup and often apply it in the morning to abandon it there. But when the other lip products didn't work for me, into my kit they went and have stayed unused but for once.
Alternatives:
Girlactik lip products. Human* and animal cruelty free plus they are one of the most-used in my kit as they are creamy, comfortable to wear and beautiful.
* I'll be covering fair trade, human rights, and slavery in the beauty industry in a future post.

Fail: Smashbox BE LEGENDARY LONG-WEAR LIP LACQUER
Patchy. Sticky. Stinky.
Thumbs down.
Alternatives:

NARS lip gloss
this color in particular Orgasm is used on 75% of my stage makeup clients.

Fail: Make Up For Ever Ultra HD
I've sampled this product a few times, really hoping that I just had it wrong upon first impression of the new formula. But sadly, no. And I've mentioned my disappointment for this new foundation in a previous post. It's thicker, dry and patchy compared to what I considered a flawless foundation with what MUFE gave us previously.

Alternative: Marc Jacobs Re(marc)able Full Cover Foundation Concentrate
Although this product will not dupe the old MUFE HD, this foundation is beautiful one-step high end product. I prefer this way more than MJ's other foundation. I do recommend using a primer with this product, especially if your skin doesn't receive liquid foundations well. I can go without primer or adding my usual froo froo products if I use heavy moisturizer.
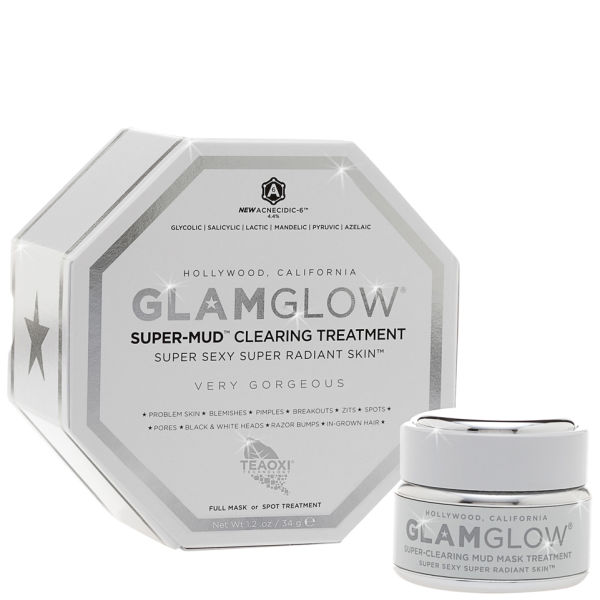
Fail: Glamglow Supermud Clearing Treatment
Simply doesn't seem to live up to the claims and it's ridiculously expensive. I never noticed an improvement in my skin clarity at all with this little over-hyped pot.
Alternative: I don't have a mask alternative. I have found skin care products in other areas that give me what I was looking for out of the above.

Personal Fail: NARS Ita brush
I bought this guy when it was near impossible to get your hands on it because of it's immense popularity. The hype was that THIS WAS THEEEE CONTOUR BRUSH YOU NEEEEEEDDD!
Uhhh, not really, in my opinion. I do still use it in my kit on client with more angular faces but it's a rarity still for a few reasons. I don't like sharp contouring on the face because it doesn't look natural. And though it's more easily achieved with this brush, it's not what I'm after. And mostly I dislike this brush because of the bristles. Constantly bleeding ink and have gotten very frayed in the short time I've owned it.

Alternative: ELF Blush Brush
This brush is nicely pointed like the Ita, although it's a completely different shape. The price point is also much more agreeable. $3 compaired to $55. I actually keep 4 of these brushes in my kit. ELF actually does brushes quite well for being so inexpensive. I have no complaints about this one. I also find it easier to defuse my shadowing with this brush compared to the Ita.
Thursday, August 20, 2015
Low-Key Gorgeousness for the Non-Makeup Girl
Most of my clientele are "gym girls" who hire me for stage or photo shoot glamming. Frequently, I'm asked what I would suggest for girls who don't want to spend too much time on their makeup. Here are some of my best tips for pulling it together for an effortless-looking day face.

Looking good doesn't require much more than enhancing your best features and using a few tricks to improve areas that need a bit of a boost. I'm going to cater all the following suggestions toward still being low maintenance whether you want to put more effort into it or less.
Brows, lashes and lips can go real far. Add some fullness to your brows on the daily or pump them up and give them structure for date night with gels or pomades.
Low-key: brow pencil or eyeshadow
Upgraded: gel or pomade
If you're blessed with long, full lashes, all you might need is a few coats of mascara and a curler. But for us mere mortals, we need some heavy artillery to get the drama for a strong look. I've always noticed that combining two mascaras will give me my favorite look, and I've never found that paying $30 for a high-end brand ever gave me superior results.
Low-key: drugstore lengthening and volumizing
Upgraded: full strip lash or individuals/clusters for super easy application
I'm as laid-back with my own lip goops as it gets. I very rarely ever fuss with lipstick because I'm frequently drinking water, so it just comes right off. So my quick fix is a pigmented gloss. But if I want to be more bold and still make my gallon-guzzling gains, liquid to matte lipsticks have great staying power.
Low-key: gloss and liner to add definition
Upgraded: liquid lipstick
Dark under-eye circles: For blue-toned circles, use a pink or peach toned color corrector. They come in cream and liquid forms. These goes under your normal under-eye concealer and do not replace them. If you have dark skin, play with more yellow or mustard orange tones until you find the right combination. It's important to note, that the darker your discoloration, the more pigmented you'll need your corrector to be. A sheer liquid will not give you full coverage of a deep, dark circle.
Hiding pimples: If you are using a cream foundation, it will double as a concealer for your face demons by adding a concentrated dot of it after you apply your base. This is my typical method when doing photo shoots. If you're using a BB cream or liquid foundation, use a slighty waxy or dryer concealer in cream or liquid form on top of your foundation and set with light powder to avoid caking. Same goes for hyper-pigmentation. I like concealer palettes because they give you lots of options for multiple issues. For example, if I'm hiding sun damage, I will play with pink and yellow tone combinations until the spot looks diluted but not ashy in color. Once the foundation goes on top, it should be invisible.
You don't always need a full-coverage foundation. I actually have rarely used a full-coverage product unless I need to completely change the skin color. Knowing how to use corrector and concealers appropriately will allow you to get away with a sheer or medium coverage foundation and avoid a heavy feel.
Low-key: Mix your favorite foundation with your moisturizer before applying and create your own BB cream that has your perfect shade, coverage, and ingredients.
Upgraded: Find your "winter" and "summer" foundation shades and keep both on hand. Mix thru the year as your skin color changes.
[Admittedly, there's a bit more going on in this transformation than a slick of mascara. But Danielle really shows how a bit of brightening and shine can wake up the complexion. Photo isn't edited, lighting darker in first photo because I seem to like to get in my own way.]
Looking good doesn't require much more than enhancing your best features and using a few tricks to improve areas that need a bit of a boost. I'm going to cater all the following suggestions toward still being low maintenance whether you want to put more effort into it or less.
#1 Frame your face.
Brows, lashes and lips can go real far. Add some fullness to your brows on the daily or pump them up and give them structure for date night with gels or pomades.
Low-key: brow pencil or eyeshadow
Upgraded: gel or pomade
If you're blessed with long, full lashes, all you might need is a few coats of mascara and a curler. But for us mere mortals, we need some heavy artillery to get the drama for a strong look. I've always noticed that combining two mascaras will give me my favorite look, and I've never found that paying $30 for a high-end brand ever gave me superior results.
Low-key: drugstore lengthening and volumizing
Upgraded: full strip lash or individuals/clusters for super easy application
I'm as laid-back with my own lip goops as it gets. I very rarely ever fuss with lipstick because I'm frequently drinking water, so it just comes right off. So my quick fix is a pigmented gloss. But if I want to be more bold and still make my gallon-guzzling gains, liquid to matte lipsticks have great staying power.
Low-key: gloss and liner to add definition
Upgraded: liquid lipstick
#2 Hide discoloration: Dark circles under the eyes, little red friends, or hyper-pigmentation around the mouth or nose can be distracting and make you self-conscious.
Dark under-eye circles: For blue-toned circles, use a pink or peach toned color corrector. They come in cream and liquid forms. These goes under your normal under-eye concealer and do not replace them. If you have dark skin, play with more yellow or mustard orange tones until you find the right combination. It's important to note, that the darker your discoloration, the more pigmented you'll need your corrector to be. A sheer liquid will not give you full coverage of a deep, dark circle.
Hiding pimples: If you are using a cream foundation, it will double as a concealer for your face demons by adding a concentrated dot of it after you apply your base. This is my typical method when doing photo shoots. If you're using a BB cream or liquid foundation, use a slighty waxy or dryer concealer in cream or liquid form on top of your foundation and set with light powder to avoid caking. Same goes for hyper-pigmentation. I like concealer palettes because they give you lots of options for multiple issues. For example, if I'm hiding sun damage, I will play with pink and yellow tone combinations until the spot looks diluted but not ashy in color. Once the foundation goes on top, it should be invisible.
#3 Give yourself foundation options.
You don't always need a full-coverage foundation. I actually have rarely used a full-coverage product unless I need to completely change the skin color. Knowing how to use corrector and concealers appropriately will allow you to get away with a sheer or medium coverage foundation and avoid a heavy feel.
Low-key: Mix your favorite foundation with your moisturizer before applying and create your own BB cream that has your perfect shade, coverage, and ingredients.
Upgraded: Find your "winter" and "summer" foundation shades and keep both on hand. Mix thru the year as your skin color changes.
Subscribe to:
Posts (Atom)